The Best Banana Cream Pie

Yes, this banana cream pie really is the best!

Base Ingredients:

  • 1 9 inch graham cracker pie crust
  • 1 cup heavy cream
  • 2 cups milk
  • 3/4 cup white sugar
  • 1/3 cup all-purpose flour
  • 1/4 teaspoon salt
  • 3 egg yolks, reserving egg whites for meringue
  • 2 tablespoons butter
  • 2 teaspoons vanilla
  • 2 tablespoons banana liqueur
  • 3 ripe bananas

Base instructions:

Preheat oven to 375 degrees.

In [easyazon-link keywords=”saucier” locale=”us”]saucier[/easyazon-link], combine the sugar, flour and salt, cream, milk and egg yolks and beat very well with a whisk.

Bring to boil over medium heat, stirring constantly. Continue cooking for one minute to ensure the flour has reached its maximum thickening and no longer tastes raw.

Remove from heat and blend in the butter, vanilla and liqueur.

Set aside to cool slightly.

Slice bananas into pie shell, top with custard and top with prepared meringue.

Bake until meringue has turned golden brown.

Remove from oven and cool thoroughly before slicing.

Meringue Ingredients:

  • 3 egg whites at room temperature
  • 3 tablespoons granulated sugar
  • 2 tablespoons banana liqueur

Meringue Instructions:

Place egg whites in mixing bowl and begin beating. When the egg whites are frothy, add the sugar and continue beating until soft peaks form, add banana liqueur.


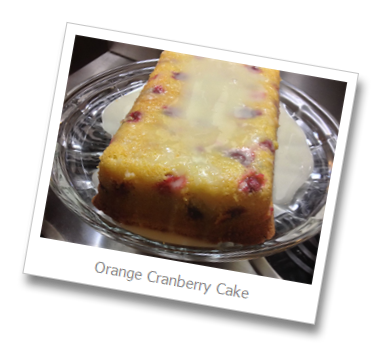
Cranberry-Lemon Cake with Lemon Icing

Berries, butter and lemon . . .

Back around Thanksgiving, I made this cake and fell in love. It starts out moist and continues to marinate over the next couple days until it is absolutely decadent.

This time ‘round I’m trying it with orange instead of lemon.

I imagine a blueberry-lemon combo would be great as well. You could get away with any berry combined with your favorite citrus.

For Cake:

1½ cups all purpose flour
1 tsp baking powder
¼ tsp baking soda
½ tsp salt
¼ cup sour cream
2 tbsp finely grated lemon zest
¼ cup fresh lemon juice
1 tsp vanilla
1 cup butter, softened
1¼ cup sugar
4 eggs, room temperature
1½ cups fresh cranberries

For Glaze:

¼ cup fresh lemon juice
1 cup confectioners’ sugar, sifted

To prepare cake:

Preheat the oven to 325 degrees F.

Spray a [easyazon-link asin=”B00008W70I” locale=”us”]9×5-inch loaf pan[/easyazon-link] (note, the pan I used is actually a [easyazon-link asin=”B0034BFKVQ” locale=”us”]hotel or steam table pan[/easyazon-link] that is slightly larger than my 9×5 inch loaf pan…my standard 9×5 inch loaf pan is too small for this recipe and resulted in me having to clean the oven), or line with [easyazon-link asin=”B006JCWGIC” locale=”us”]parchment paper[/easyazon-link].

In a medium sized bowl, whisk together flour, baking powder, baking soda and salt. Set aside. In a separate bowl, whisk together sour cream, zest, juice, and vanilla. Set aside.

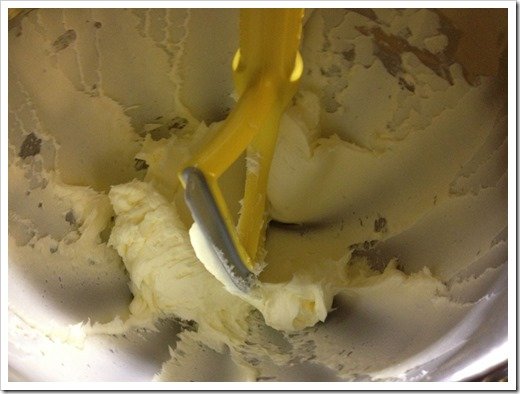
In the large bowl of a [easyazon-link asin=”B006LLZ83G” locale=”us”]standing mixer[/easyazon-link], beat butter and sugar on medium-high speed until light and fluffy, about 3 minutes. I used the [easyazon-link asin=”B002KAPN9Q” locale=”us”]BeaterBlade[/easyazon-link] for my [easyazon-link asin=”B00005UP2P” locale=”us”]Kitchen Aid Mixer[/easyazon-link]. It nearly eliminates scraping of the bowl.

Beat in eggs, one at a time, until fully incorporated.

Reduce mixer speed and alternatively beat in ⅓ of flour mixture, followed by ½ of sour cream mixture, and repeat, ending with the last ⅓ of the flour mixture. Be sure to pause the mixer occasionally to scrape down sides of the bowl. Use a [easyazon-link asin=”B000ILNHGU” locale=”us”]spatula[/easyazon-link] to gently fold in cranberries.

Spoon batter into prepared loaf pan and bake 60 minutes, until top springs back when lightly pressed or a toothpick inserted in the center comes out clean. Cool 5 minutes in pan, then transfer to a [easyazon-link asin=”B002ECFH32″ locale=”us”]stainless cooling rack[/easyazon-link].

Cool completely before icing.

To prepare glaze:

To make glaze, whisk together lemon juice and confectioners’ sugar until there are no lumps.

Final assembly:

Drizzle over cooled cake.


Mise en Place
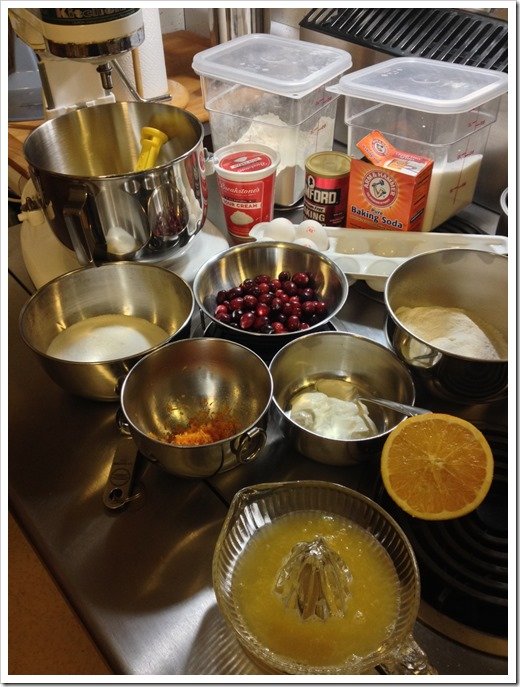
Mise en Place for Lemon Cranberry Cake


Softened butter ready to be beaten into submission by a [easyazon-link asin=”B002KAPN9Q” locale=”us”]BeaterBlade[/easyazon-link]
Softened Butter with a BeaterBlade


Butter after its initial mix
Butter After Initial Mix


Butter after just having the sugar mixed in
First Mix of Sugar with Butter


Butter and sugar after having been creamed together for 3 full minutes
Properly Creamed Butter and Sugar


The completed batter, waiting for the cranberries
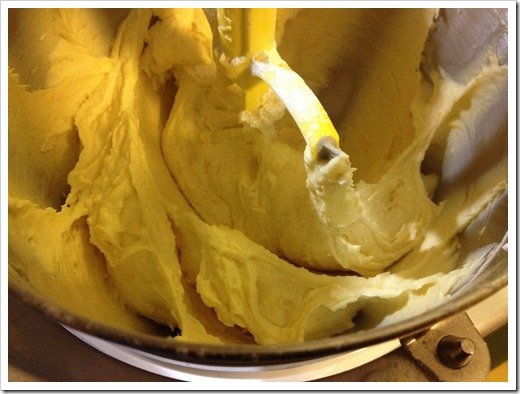
The Completed Batter ready for the cranberries


The cranberry cake waiting for the oven
The Cranberry Cake waiting for the oven


The cake fresh from the oven waiting to be plated and iced
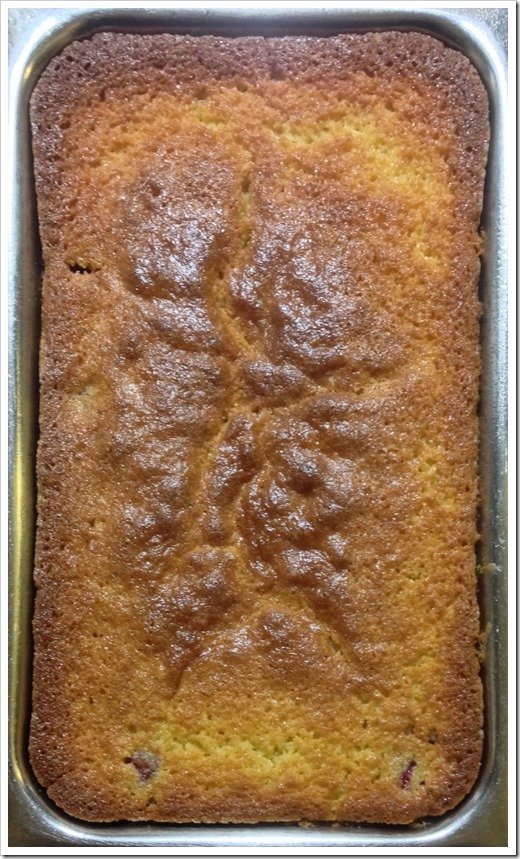
The Cranberry Cake fresh from the oven

Three-pressure Canner Weight Sets

Tired of babysitting your pressure canner? Buy a three-pressure weight!

Traditional dial-gauge canners require you to baby-sit them and continually adjust the heat to maintain the pressure. You’ll think you have it correct and then it’ll start climbing again! Or worse, it’ll drop and you have to start all over, possibly turning your food to mush. All that fluctuating pressure can lead to your liquid syphoning out of your jars. A three-pressure weight set will help! It’s much easier to listen to the weight jiggle while you are cleaning up the kitchen – or sitting on the couch. With a three-pressure weight set, the the exact heat setting under the canner isn’t quite so critical, so it’s much easier to maintain. A more even pressure keeps the syphoning to a minimum. Did I mention you can sit on the couch?

Mirro

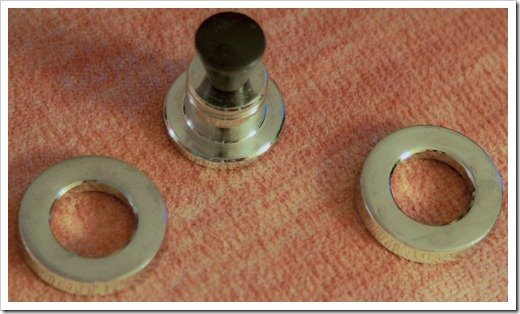
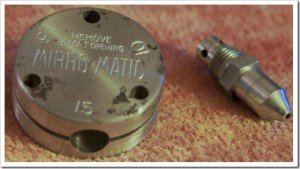
Mirro's version of the 3-pressure weight set.Mirro has shipped with its canners for years a weight that is capable of the three different pressures that the USDA requires for the definition of a canner. Presto and All-American haven’t always done this. I do not have any [easyazon-link asin=”B000RNH7PQ” locale=”us”]Mirro canners[/easyazon-link], but it is my understanding that the newest ones are shipping with three separate weights rather than the [easyazon-link asin=”B000U7QEXK” locale=”us”]“hockey-puck” style[/easyazon-link] shown here. This hockey-puck style weight “jiggles” every few seconds to maintain the proper pressure.

All-American

All-American’s older models shipped without a three-pressure weight. You had to constantly adjust the heat of your burner under your canner to maintain the proper pressure according to the dial-gauge.

Their newer canners ship with a [easyazon-link asin=”B000S8I0YC” locale=”us”]weight that is very similar in design[/easyazon-link] to the old Mirro setup. You can buy the parts to retrofit your older model.

This weight also “jiggles” only every few seconds.

Presto

Presto’s traditional weight is a 15 pound regulator. As with the older All-American canners, you had to constantly adjust the heat under your canner to maintain the proper pressure. (Of course, if you need to can at 15 pounds pressure, you can use this weight as-is.) Presto has a a [easyazon-link asin=”B000HMBVQ8″ locale=”us”]three-piece weight set[/easyazon-link] available for its canners. This weight set allows you to choose a set pressure of five, ten or fifteen pounds. The Presto weights will rock gently when you’ve reached your set pressure.

Presto’s Traditional 15 Pound Pressure Weight
One version of Presto's traditional 15 pound weight.

Presto’s Three-piece Weight SetPresto's Three-piece Weight Set

The three-piece weight set, set up for 10 pounds pressure.Presto's three-piece weight set, setup for 10 pounds pressure

The three-piece weight set, set up for 15 pounds pressure.Presto's three-piece weight set, setup for 15 pounds pressure

This is the Mirro version of the Presto three-piece weight set. All-American’s weight is very similar to this.Mirro's 3 pressure weight and vent tube.

A brief video of the Presto three-piece weight set in action:

The traditional Presto 15lb weight:[easyazon-image align=”center” asin=”B0014IGAPG” locale=”us” height=”160″ src=”http://ecx.images-amazon.com/images/I/41kPPh0W2mL._SL160_.jpg” width=”130″]

[easyazon-cta align=”center” asin=”B0014IGAPG” height=”28″ key=”amazon-us-small-orange” locale=”us” width=”120″]

The Presto 3-pressure weight set: [easyazon-image align=”center” asin=”B000HMBVQ8″ locale=”us” height=”160″ src=”http://ecx.images-amazon.com/images/I/3121uUIqs5L._SL160_.jpg” width=”158″]

[easyazon-cta align=”center” asin=”B000HMBVQ8″ height=”28″ key=”amazon-us-small-orange” locale=”us” width=”120″]

The Mirro 3-pressure weight: [easyazon-image align=”center” asin=”B000U7QEXK” locale=”us” height=”160″ src=”http://ecx.images-amazon.com/images/I/4129R14HtzL._SL160_.jpg” width=”160″] [easyazon-cta align=”center” asin=”B000U7QEXK” height=”28″ key=”amazon-us-small-orange” locale=”us” width=”120″] The All-American 3-pressure weight: [easyazon-image align=”center” asin=”B000S8I0YC” locale=”us” height=”160″ src=”http://ecx.images-amazon.com/images/I/51RkoxAYaWL._SL160_.jpg” width=”160″] [easyazon-cta align=”center” asin=”B000S8I0YC” height=”28″ key=”amazon-us-small-orange” locale=”us” width=”120″]

Lemon Cheesecake with Blueberry Glaze

Lemon Cheesecake

Crust:

1 c. sifted all-purpose flour
1/4 c. sugar
1 Tbsp. lemon zest
1/2 c. butter
1 slightly beaten egg yolk
1/4 tsp. [easyazon-link asin=”B000GAWH4G” locale=”us”]vanilla[/easyazon-link]

Filling:

5 – 8 oz. packages of cream cheese, softened
1/4 tsp. [easyazon-link asin=”B001GE8N4Y” locale=”us”]vanilla[/easyazon-link]
1 Tbsp. lemon zest
juice of one lemon
1 3/4 c. sugar
3 Tbsp. flour
1/4 tsp. salt
4 or 5 eggs (1 cup)
2 egg yolks
1/4 c. whipping cream

Make Crust:

Combine first three ingredients. Cut in butter till mixture is crumbly. Add egg yolk and vanilla. Blend thoroughly. Pat 1/3 of dough on bottom of 9 in. [easyazon-link asin=”B0091QS41G” locale=”us”]spring-form pan[/easyazon-link] (sides removed). Bake in hot oven (400 F.) for about 5 minutes or until golden; cool. Attach sides to bottom, butter, and pat remaining dough on sides to height of 1 3/4″. Preheat oven to 450 degrees.

Make Filling:

Beat cream cheese until creamy. Add vanilla, lemon peel and juice. Mix next 3 ingredients, gradually blend into cheese. Add eggs and egg yolks one at a time, beating after each just to blend. Gently sir in whipping cream.

Turn into crust-lined pan. Bake at 450 F. for 12 minutes; reduce heat to 300 and continue baking 55 minutes. Remove from oven; cool. Loosen sides with [easyazon-link asin=”B0000VM5AM” locale=”us”]flat spatula[/easyazon-link] after 1/2 hour. Remove sides at end of 1 hour. Allow to cool 2 hours longer.

Blueberry Glaze

2 cups sugar
4 tablespoons cornstarch
2 cups water
4 cups fresh blueberries, divided

Make Blueberry Glaze:

Combine sugar and cornstarch in a small saucepan; blend thoroughly. Gradually stir in water.

Crush 1 cup blueberries; add to sugar mixture.

Cook over medium heat, stirring constantly, until mixture thickens and comes to a boil.

Continue to boil about 2 minutes or until mixture is clear.

Strain through [easyazon-link asin=”B000HVBES4″ locale=”us”]fine mesh strainer[/easyazon-link] or [easyazon-link asin=”B00069ZUXW” locale=”us”]chinois[/easyazon-link]. Cool.

Final Assembly

Arrange remaining blueberries over top of chilled cheesecake.

Pour cooled glaze over berries.

Vintage Cookie Plates for the Assistent Mixer

Need to make some cookies in your Assistent mixer, 1950’s style?

The Assistent mixer has been around for many decades and the model shown on the front of that manual in the picture below appears to be an N4. I believe the N4 dates to the 1950s.

These cookie plates would attach in place of the grinder plate at the end of the meat grinder and you’d feed your cookie dough through – and out would come a strip of formed cookie dough, which you would then cut to whatever size you wanted.

Aren’t they just plain cool?

assistent-mixer-cookie-plates-manual

assistent-mixer-cookie-plates