Pressure Canner Refurbishment

Suggestions on fixing up an old canner.

Refurbishing and upgrading your old pressure canner.

If you have an old canner in a closet or found one at a yardsale, the following articles may help you get it working again. Please check with your local extension agency office for gauge testing, if your canner has a gauge.

Safe Canning Tips

Just because grandmaw did it that way doesn’t mean it’s the correct way to do it now.

Now don’t get me wrong here, I ain’t dissin’ your grandmaw. I’m sure your granny was a wonderful lady. Mine sure was. But, just because she did something a certain way, doesn’t necessarily mean you should. We have access to technology, testing, and good old science that our grannies didn’t.

  • Hey! My grandmaw did it THIS way and she never killed anyone.
    That you know about. While we can’t go back in time and prove it there has been speculation that mysterious deaths in the past could have been caused by canned foods that were not safe. We have many more years of knowledge that she didn’t have available to her. How about let’s go with the scientists here?
  • You can boil green beans for 3 hours and they’ll be safe.
    No. Actually you can’t be sure of that. You might get lucky. You might poison someone. Research tells us that it would take more than 12 hours in a boiling water bath to ensure their safety. For the record: I’m not eating green beans you BWBathed. And I’m not letting my family eat them. And I’m going to discourage your family from eating them.
  • Dry canning is safe.
    What do you mean by “dry canning”? If you mean putting dry foods in jars, putting lids on those jars and putting it all in the oven – um, probably not a great idea. Canning jars aren’t supposed to go in an oven. The glass isn’t meant for that dry heat – it can shatter! The newest recommendations for lids is to not even simmer them, much less throw them in a hot oven! If, by “dry canning”, you mean vacuum sealing with something like a FoodSaver – yeah you can do that.
  • You should turn your jars upside down after processing to make sure they seal.
    No. Not really. Even where this is written down as an approved method, it is said to be questionable. You are dealing with the safety of your family here, not to mention yourself, do you really want to take a chance? We know that turning jars upside down can allow food to get between the rim of the jar and the lid and cause a seal failure.
  • My granny left the rings on her jars, why should I take mine off? Just because you say so?
    Not just because I say so. How about three reasons? One, and most important, is that the ring can hide from you an unsealed jar and you may not know it’s spoiled – the ring can hold that lid down. Two, hygiene, pure and simple – there is frequently foodstuffs under those rings and: eww. Three is money. If you remove your rings you can wash them and reuse them for your next round of canning.
  • I’ve got a big family and I’m going to can my green beans in half-gallon jars. It’s ok because I’m using a pressure canner, right?
    Just because you are using a pressure canner, does that mean that the heat has reached all the way to the middle of those big jars and has been hot enough long enough to kill everything that could kill you? You can’t be sure. Only high-acid juices are approved for canning in half-gallon jars.
  • About that heat reaching the middle of the jars thing . . . is this why pumpkin puree is not safe? I don’t need a half-gallon of that!
    Pumpkin puree is very dense though, isn’t it? I mean when we dump it out of a commercial can, it pretty much sits there without slumping, doesn’t it? It’s so thick and dense that the heat can’t get through to all areas of the jar – leaving some areas under processed and unsafe.
  • I’ve got this great recipe that’s been handed down in the family. I’m going to can that!
    Has it been tested so that you know how long to can it to make it safe? I didn’t think so. Maybe you should reconsider and use only tested recipes.
  • I’m going to do it the time-honoured, traditional way!
    You can also speed and maybe you don’t get a ticket. I don’t recommend it; eventually the Officer Botulism will catch you.

I recommend going to the website of the National Center for Home Food Preservation. They are the ones who do the testing, after all.

Double-Chocolate Apricot-Pecan Cookies

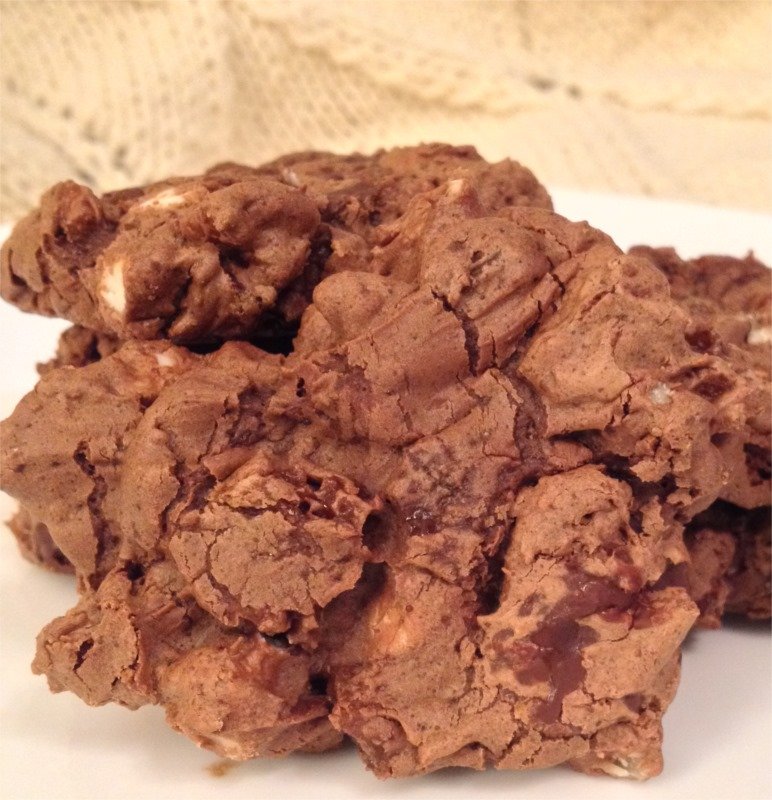
“That’s a damn fine cookie.”

110 grams all-purpose flour
55 grams cocoa powder
1 teaspoon sea salt
1/4 + 1/8 teaspoon baking powder
98 grams butter
4 eggs
325 grams sugar
3/4 tablespoon vanilla
338 grams pecans
390 grams dark chocolate chips
390 grams white chocolate chips
450 grams milk chocolate
345 grams dried apricots

Preheat oven to 330 degrees Fahrenheit.

Chop apricots and pecans.

Sift together flour, cocoa powder, salt, and baking powder.

Melt together milk chocolate and butter.

Beat together eggs and sugar until foamy. Add vanilla and melted chocolate mixture.

Add dry ingredients and apricots. Then stir in pecans and chocolate chips.

Scoop dough onto parchment-lined sheet pans and bake 12-15 minutes until top looks a little dry and cookies appear to be set.

(Using a [easyazon-link keywords=”number 30 disher” locale=”us”]number 30 disher[/easyazon-link], this recipe yielded 54 cookies.)

Ginger Spiced Peach Jam

4 cups finely chopped peaches
1/4 cup fresh lemon juice
7-1/2 cups sugar
1/2 teaspoon ground allspice
1/2 teaspoon cinnamon
1/2 teaspoon cloves
2-3 tablespoons finely grated fresh ginger
1 pouch [easyazon-link asin=”B004SQUNR2″ locale=”us”]Certo Fruit Pectin[/easyazon-link]

Add spices, sugar, peaches, lemon juice and ginger to an [easyazon-link asin=”B000FNLT8E” locale=”us”]8 – 10 quart, heavy-bottomed kettle[/easyazon-link].

Bring to a full, roiling boil, over high heat, stirring constantly.  Add pectin and return to a roiling boil.

Boil one minute, stirring constantly.  Remove from heat and skim any foam (if desired; I don’t bother).

Process according to USDA recommendations for jams and jellies for a shelf-stable product:

http://www.uga.edu/nchfp/how/can7_jam_jelly.html

Jim’s Cornbread

Southern Cornbread Jim’s Way

Cooking school taught me that you have to have a balance of tastes in your dishes. Bitter, salty, sour and sweet all must be in harmony; things taste better that way.

It’s why southern cornbread (and biscuits … and pancakes! Ohhh pancakes!) has buttermilk. It’s also why – even though I’m in the South – there is a touch of sugar in this cornbread.

1 cup yellow corn meal
1 cup self rising flour
1 T baking powder
1 t salt
2 T sugar
fresh ground pepper
1 cup buttermilk
2 large eggs
4 T butter
4 T olive oil

Preheat oven and [easyazon-link keywords=”12-inch cast iron skillet” locale=”us”]No. 10 cast iron skillet[/easyazon-link] (a Number 10 is a 12 inch pan) to 425 degrees.

Mix all dry ingredients together. Beat in eggs and milk.

Remove skillet from oven. Add oil and butter, allowing butter to melt. Pour most of the oil & butter mixture into batter and stir well.

Sprinkle skillet lightly with salt and add batter.

Bake for 20-25 minutes.

Don’t have buttermilk? You can substitute one cup milk + 1 T apple cider vinegar.