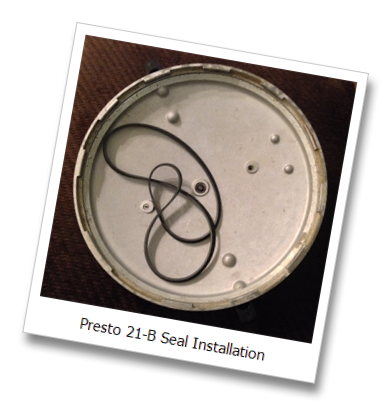
How to install the Seal on a Presto 21-B Pressure Canner

Having trouble with that flat seal on your vintage canner?

Presto 21-B pressure canner seal installation with video.

The flat seals on the National Number 7 canner clones, such as the Presto 21-B are sometimes a royal pain to insert properly. They fit into a groove in the canner lids and if you are not careful, they will not get seated properly. Sometimes they can stretch and be even more difficult to fit.

After you’ve done it a few times, it doesn’t seem to be so bad, but the first time – you almost always think you have the wrong seal!

You push the seal into the groove from the inside out, working in small sections, constantly making sure that the seal doesn’t pop back out as you move on. Sometimes you have to start over. Sometimes you have to work your way around the lid a couple times. And, sometimes, the seal is just too old and stretched to fit any longer. When that happens you need to [easyazon-link asin=”B000LL9NY2″ locale=”us”]order a new seal[/easyazon-link].

The [easyazon-link asin=”B000LL9NY2″ locale=”us”]Presto part number is 09907[/easyazon-link].

Here is a brief video showing how I do it.

[easyazon-image align=”none” asin=”B000LL9NY2″ locale=”us” height=”110″ src=”http://ecx.images-amazon.com/images/I/41RxjUg5f4L._SL110_.jpg” width=”106″]
[easyazon-cta align=”none” asin=”B000LL9NY2″ height=”28″ key=”amazon-us-small-orange” locale=”us” width=”120″]

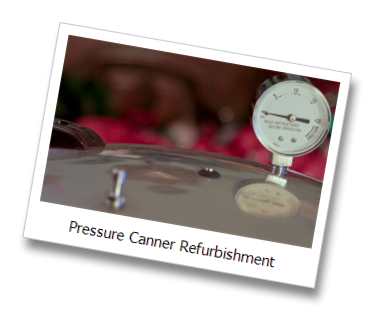
Pressure Canner Refurbishment

Suggestions on fixing up an old canner.

Refurbishing and upgrading your old pressure canner.

If you have an old canner in a closet or found one at a yardsale, the following articles may help you get it working again. Please check with your local extension agency office for gauge testing, if your canner has a gauge.

Safe Canning Tips

Just because grandmaw did it that way doesn’t mean it’s the correct way to do it now.

Now don’t get me wrong here, I ain’t dissin’ your grandmaw. I’m sure your granny was a wonderful lady. Mine sure was. But, just because she did something a certain way, doesn’t necessarily mean you should. We have access to technology, testing, and good old science that our grannies didn’t.

  • Hey! My grandmaw did it THIS way and she never killed anyone.
    That you know about. While we can’t go back in time and prove it there has been speculation that mysterious deaths in the past could have been caused by canned foods that were not safe. We have many more years of knowledge that she didn’t have available to her. How about let’s go with the scientists here?
  • You can boil green beans for 3 hours and they’ll be safe.
    No. Actually you can’t be sure of that. You might get lucky. You might poison someone. Research tells us that it would take more than 12 hours in a boiling water bath to ensure their safety. For the record: I’m not eating green beans you BWBathed. And I’m not letting my family eat them. And I’m going to discourage your family from eating them.
  • Dry canning is safe.
    What do you mean by “dry canning”? If you mean putting dry foods in jars, putting lids on those jars and putting it all in the oven – um, probably not a great idea. Canning jars aren’t supposed to go in an oven. The glass isn’t meant for that dry heat – it can shatter! The newest recommendations for lids is to not even simmer them, much less throw them in a hot oven! If, by “dry canning”, you mean vacuum sealing with something like a FoodSaver – yeah you can do that.
  • You should turn your jars upside down after processing to make sure they seal.
    No. Not really. Even where this is written down as an approved method, it is said to be questionable. You are dealing with the safety of your family here, not to mention yourself, do you really want to take a chance? We know that turning jars upside down can allow food to get between the rim of the jar and the lid and cause a seal failure.
  • My granny left the rings on her jars, why should I take mine off? Just because you say so?
    Not just because I say so. How about three reasons? One, and most important, is that the ring can hide from you an unsealed jar and you may not know it’s spoiled – the ring can hold that lid down. Two, hygiene, pure and simple – there is frequently foodstuffs under those rings and: eww. Three is money. If you remove your rings you can wash them and reuse them for your next round of canning.
  • I’ve got a big family and I’m going to can my green beans in half-gallon jars. It’s ok because I’m using a pressure canner, right?
    Just because you are using a pressure canner, does that mean that the heat has reached all the way to the middle of those big jars and has been hot enough long enough to kill everything that could kill you? You can’t be sure. Only high-acid juices are approved for canning in half-gallon jars.
  • About that heat reaching the middle of the jars thing . . . is this why pumpkin puree is not safe? I don’t need a half-gallon of that!
    Pumpkin puree is very dense though, isn’t it? I mean when we dump it out of a commercial can, it pretty much sits there without slumping, doesn’t it? It’s so thick and dense that the heat can’t get through to all areas of the jar – leaving some areas under processed and unsafe.
  • I’ve got this great recipe that’s been handed down in the family. I’m going to can that!
    Has it been tested so that you know how long to can it to make it safe? I didn’t think so. Maybe you should reconsider and use only tested recipes.
  • I’m going to do it the time-honoured, traditional way!
    You can also speed and maybe you don’t get a ticket. I don’t recommend it; eventually the Officer Botulism will catch you.

I recommend going to the website of the National Center for Home Food Preservation. They are the ones who do the testing, after all.

Bosch Universal Bowls Explained


at least 7 bowls, 2 series of mixers, multiple splash rings: extreme chaos

I went looking for a stainless steel bowl for my Bosch Universal mixer. Oh boy. That wasn’t fun. I quickly got a headache. There are at least 6 Bosch bowls spanning two Bosch Universal classifications and no website seemed to agree with any other. Here’s what I learned.

First some history and definitions:

Bosch Universal Mixer Enamel on Steel Mixing Bowl The original Bosch bowl was a flat-bottomed, dough-only bowl that had a three-pronged dough hook that mounted on the bottom of the bowl. This bowl started out with the first Universal mixer in 1951. Some time later Bosch introduced the white, all-purpose, donut-shaped bowl with the center post. I have currently narrowed this down to sometime between 1961 and 1970. I’ll refer to Universal mixers prior to 2007 as Classic Universals. I am lumping together everything from the original 1950’s mixers, to the 2007 redesign into this category – UM3, MUM6, Comfort Plus, the whole lot. The post-2007 mixer is the Universal Plus and will be referred to as such. Note: the links below will take you to pages on this site with more in-depth coverage of each bowl.

The current line-up:

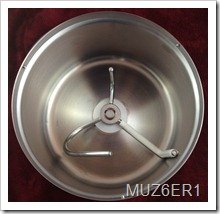
Bosch Universal Original Bowl in StainlessBosch makes the MUZ6ER1 stainless steel bowl. This bowl is the original-style dough-only bowl that has shipped with Bosch Universals since their inception. This bowl is the flat-bottomed bowl that has the dough hook mounted to the bottom. This bowl will fit on all Classic Universals as-is. It does not have the built-in locking mechanism on Universal Plus bowls and is unstable on the Universal Plus. To fix this issue people are using rubber bumpers to keep it stable. There have been at least two versions. The current version has 3 locking pins on the inside of the bowl and use the newer splash-ring that fits inside the rim of the bowl. The ER1 has an approximate capacity of 6 quarts by volume and is rated at 14 pounds of dough.

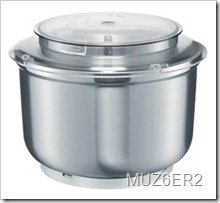
Bosch Universal Plus Stainless Steel Bowl MUZ6ER2Bosch also makes the MUZ6ER2 stainless steel bowl. This is the all-purpose stainless bowl designed for the Universal Plus. It is specific to the Universal Plus and will not fit the Classic Universals. This bowl uses the standard French whisks, batter whisks, cookie paddles and dough hook. This bowl has 4 locking pins and requires a 4-pin splash ring. The ER2 has a removable center post for easy clean-up. The ER2 has an approximate capacity of 6 1/2 quarts or 15 pounds of dough.

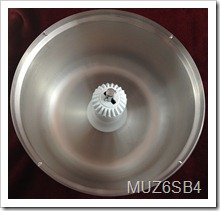
Bosch Universal Stainless Steel Bowl MUZ6SB4L’Equip makes two stainless bowls for Bosch Universal mixers. MUZ6SB3 and MUZ6SB4. These bowls are identical except for the number of splash-ring locking pins. These bowls fit both Classic Universal mixers and Universal Plus mixers. They both have removable drive shafts for easy cleaning. While you can use the SB4 with a Classic Universal and an SB3 with a Universal Plus, you will wind up with mis-matched splash-rings. If this isn’t a concern for you, feel free to mix n match! These bowls are able to hold approximately 5 1/2 quarts or 12 pounds dough.

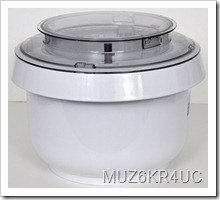
Bosch Universal Bowl MUZ6KR4UCBosch makes two all-purpose plastic bowls designed for both kneading and mixing. These are the MUZ6KR4 and MUZ6KR4UC. The MUZ6KR4 has three splash-ring locking pins and uses a splash-ring that fits inside the bowl. This is the bowl that I believe was introduced in 1984 with the MUM6 series of mixers. The KR4 has an approximate capacity of 5 1/2 quarts or 12 pounds of dough. The MUZ6KR4UC bowl is the newest design and is specific to the Universal Plus. It has 4 locking pins and a removable drive shaft for easy cleaning. The UC is rated at approximately 6 1/2 quarts and can knead 15 pounds of dough.

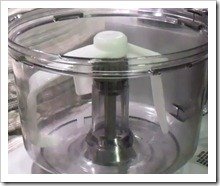
Bosch Universal Mini Dough Hook for the Slicer Shredder BowlThat brought me up to 6 bowls; I thought my research was finished. I had forgotten about the slicer-shredder bowl. I knew that there was a set of whisks for the slicer-shredder bowl – I had even used them. Then L’Equip dropped a bit of a bombshell into the mix with the release of a mini dough hook for the slicer-shredder bowl.

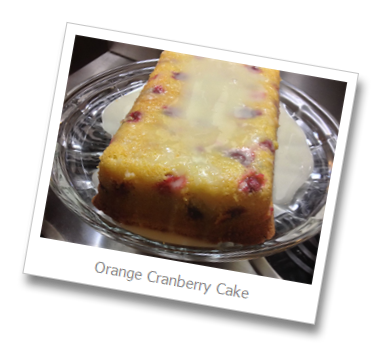
Cranberry-Lemon Cake with Lemon Icing

Berries, butter and lemon . . .

Back around Thanksgiving, I made this cake and fell in love. It starts out moist and continues to marinate over the next couple days until it is absolutely decadent.

This time ‘round I’m trying it with orange instead of lemon.

I imagine a blueberry-lemon combo would be great as well. You could get away with any berry combined with your favorite citrus.

For Cake:

1½ cups all purpose flour
1 tsp baking powder
¼ tsp baking soda
½ tsp salt
¼ cup sour cream
2 tbsp finely grated lemon zest
¼ cup fresh lemon juice
1 tsp vanilla
1 cup butter, softened
1¼ cup sugar
4 eggs, room temperature
1½ cups fresh cranberries

For Glaze:

¼ cup fresh lemon juice
1 cup confectioners’ sugar, sifted

To prepare cake:

Preheat the oven to 325 degrees F.

Spray a [easyazon-link asin=”B00008W70I” locale=”us”]9×5-inch loaf pan[/easyazon-link] (note, the pan I used is actually a [easyazon-link asin=”B0034BFKVQ” locale=”us”]hotel or steam table pan[/easyazon-link] that is slightly larger than my 9×5 inch loaf pan…my standard 9×5 inch loaf pan is too small for this recipe and resulted in me having to clean the oven), or line with [easyazon-link asin=”B006JCWGIC” locale=”us”]parchment paper[/easyazon-link].

In a medium sized bowl, whisk together flour, baking powder, baking soda and salt. Set aside. In a separate bowl, whisk together sour cream, zest, juice, and vanilla. Set aside.

In the large bowl of a [easyazon-link asin=”B006LLZ83G” locale=”us”]standing mixer[/easyazon-link], beat butter and sugar on medium-high speed until light and fluffy, about 3 minutes. I used the [easyazon-link asin=”B002KAPN9Q” locale=”us”]BeaterBlade[/easyazon-link] for my [easyazon-link asin=”B00005UP2P” locale=”us”]Kitchen Aid Mixer[/easyazon-link]. It nearly eliminates scraping of the bowl.

Beat in eggs, one at a time, until fully incorporated.

Reduce mixer speed and alternatively beat in ⅓ of flour mixture, followed by ½ of sour cream mixture, and repeat, ending with the last ⅓ of the flour mixture. Be sure to pause the mixer occasionally to scrape down sides of the bowl. Use a [easyazon-link asin=”B000ILNHGU” locale=”us”]spatula[/easyazon-link] to gently fold in cranberries.

Spoon batter into prepared loaf pan and bake 60 minutes, until top springs back when lightly pressed or a toothpick inserted in the center comes out clean. Cool 5 minutes in pan, then transfer to a [easyazon-link asin=”B002ECFH32″ locale=”us”]stainless cooling rack[/easyazon-link].

Cool completely before icing.

To prepare glaze:

To make glaze, whisk together lemon juice and confectioners’ sugar until there are no lumps.

Final assembly:

Drizzle over cooled cake.


Mise en Place
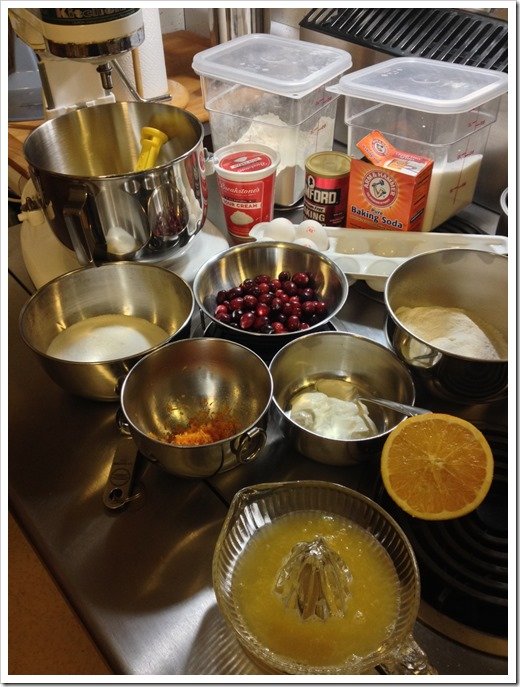
Mise en Place for Lemon Cranberry Cake


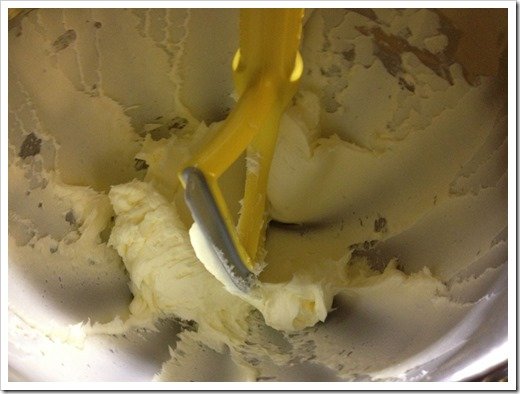
Softened butter ready to be beaten into submission by a [easyazon-link asin=”B002KAPN9Q” locale=”us”]BeaterBlade[/easyazon-link]
Softened Butter with a BeaterBlade


Butter after its initial mix
Butter After Initial Mix


Butter after just having the sugar mixed in
First Mix of Sugar with Butter


Butter and sugar after having been creamed together for 3 full minutes
Properly Creamed Butter and Sugar


The completed batter, waiting for the cranberries
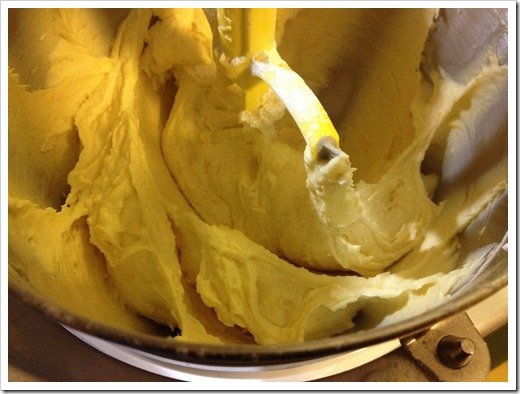
The Completed Batter ready for the cranberries


The cranberry cake waiting for the oven
The Cranberry Cake waiting for the oven


The cake fresh from the oven waiting to be plated and iced
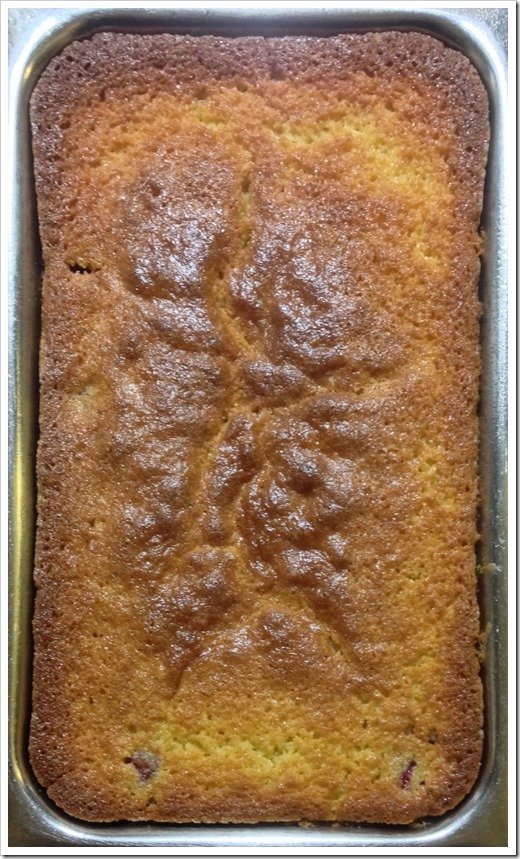
The Cranberry Cake fresh from the oven